
By Joe V. Smith
You just returned from a successful photo shoot with perfect pictures of your favorite animal. Everything came together–pleasing subject, great light, excellent composition, perfect exposure, sharp focus and no camera blur. But when you look at your images you see a problem you missed in the field—distracting backgrounds, often so distracting that your image(s) becomes useless.
So what can the photographer do to fix or minimize a background problem?
One fix, rarely practical, is to drive to a different location and find one with a better background—one that is smooth, has even tonality and pleasing and complementary colors and no distractions from manmade or natural items.
What you want to end up with is an image like this:
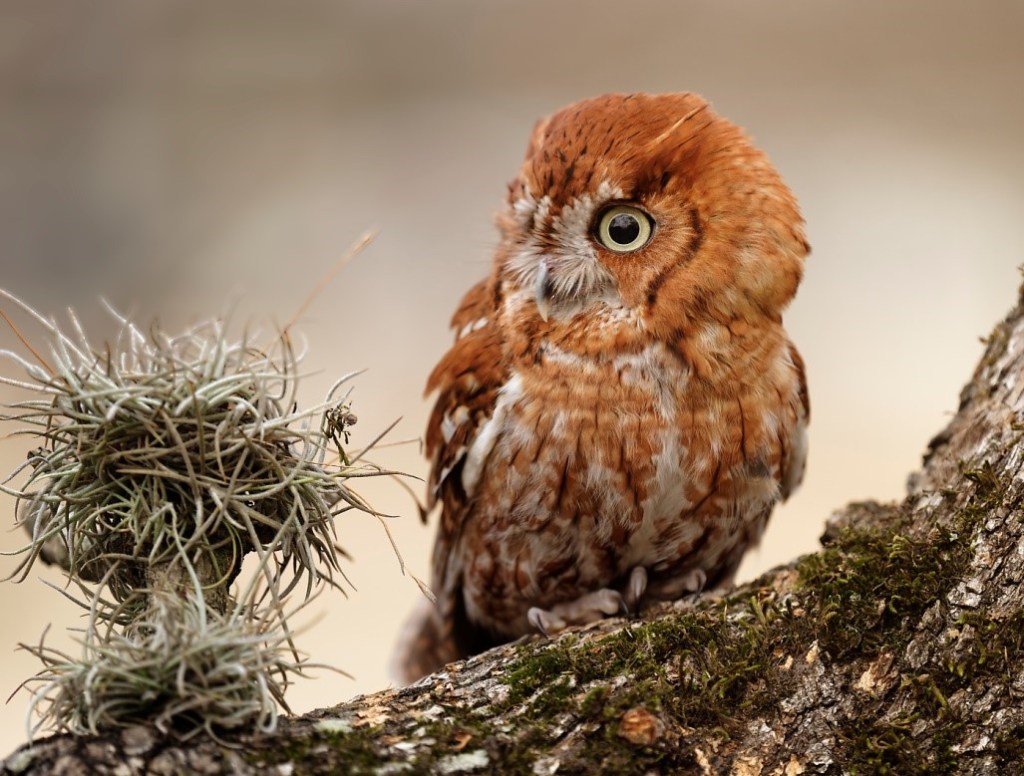
I got close to the bird and the building in the background was at least 300-500 yards away so it has almost disappeared. It was an overcast morning so light was soft and colors were rich. Tonality was uniform with no distracting highlights or bright spots. I used a slow shutter speed and shot wide open to keep the ISO as low as possible to avoid noise. I used a monopod to keep my shooting platform as stable as possible.
Field Fixes
Here are some things you can do on site with your existing equipment without resorting to changing locations.
1. Vary Distances –increase the distance between the subject and its background.
Details in backgrounds will become less visible as the distance between the subject and background increases. This can work when setting up a bird feeder or perch in your backyard, but rarely helps when photographing native subjects in natural habitats. Use this technique in planning your shot.
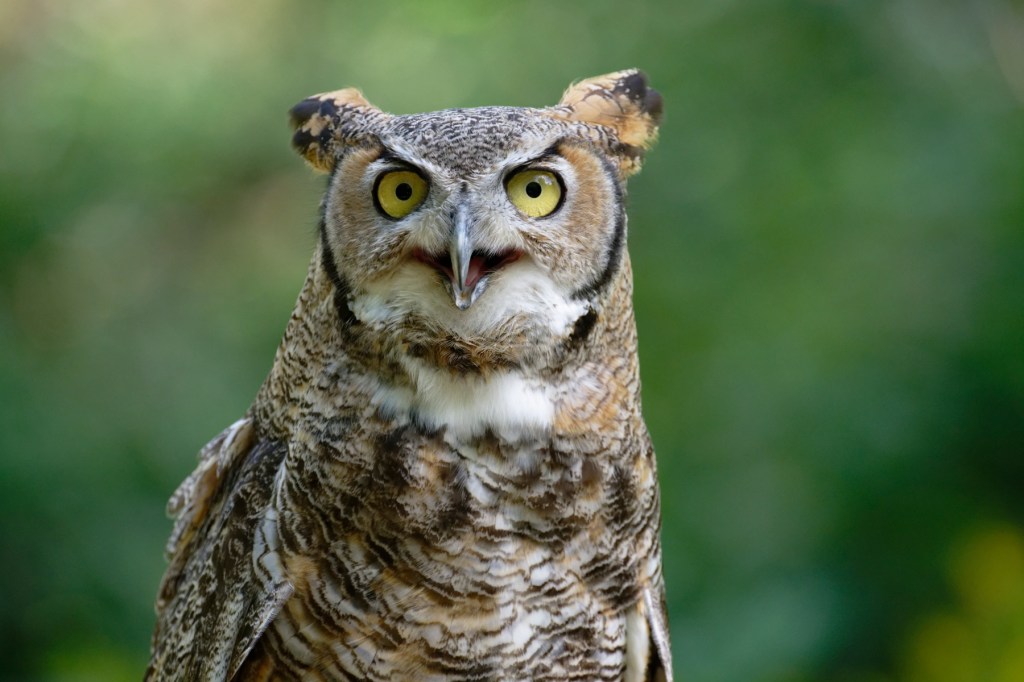
2. Vary Distances–shorten the distance between the photographer and the subject. Move closer to the subject.
This makes the subject more prominent in the image and reduces the impact of distracting things in the background.
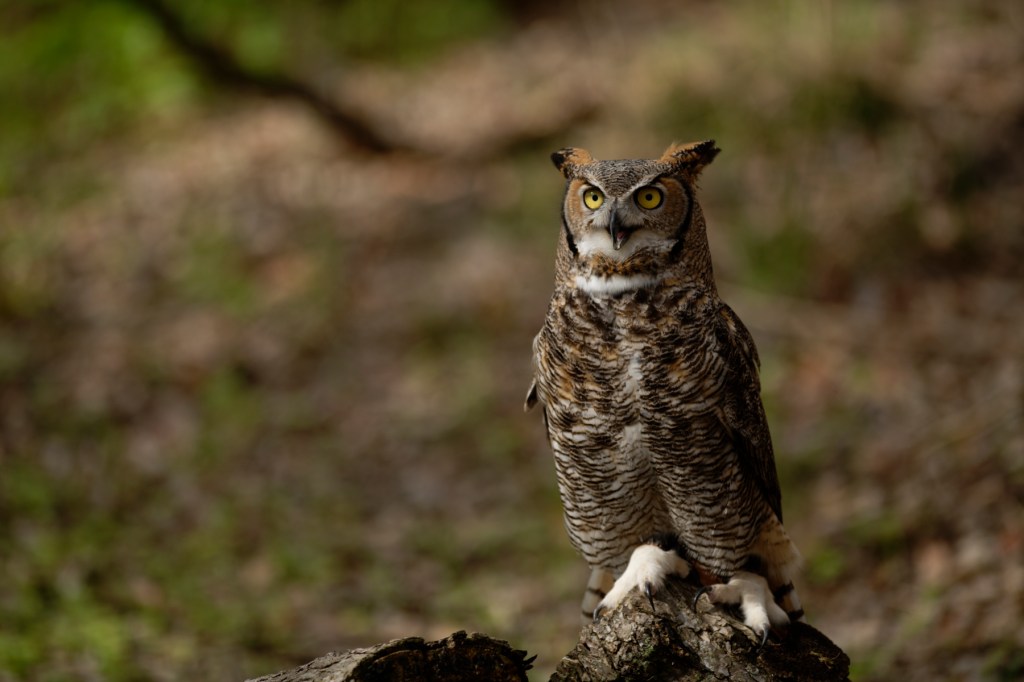
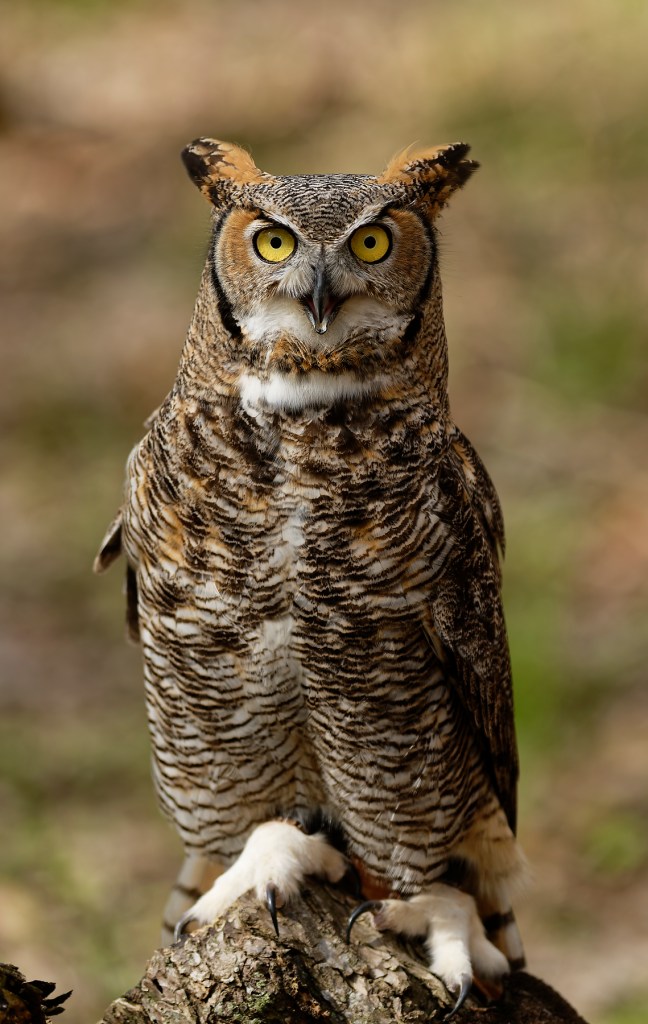
The only difference between the two images below is that I got closer to the Great Horned Owl in the vertical image. Shooting the first image at f2.8 helped a bit, but did not solve the problem. The real fix was getting closer by using my feet!
For both images, camera was a Nikon D850; Nikon 300mm f2.8 lens at f2.8; on monopod. No cropping. Exp comp -.7; ISO 64; 1/800
3. Shorten the apparent distance between the photographer and the subject.
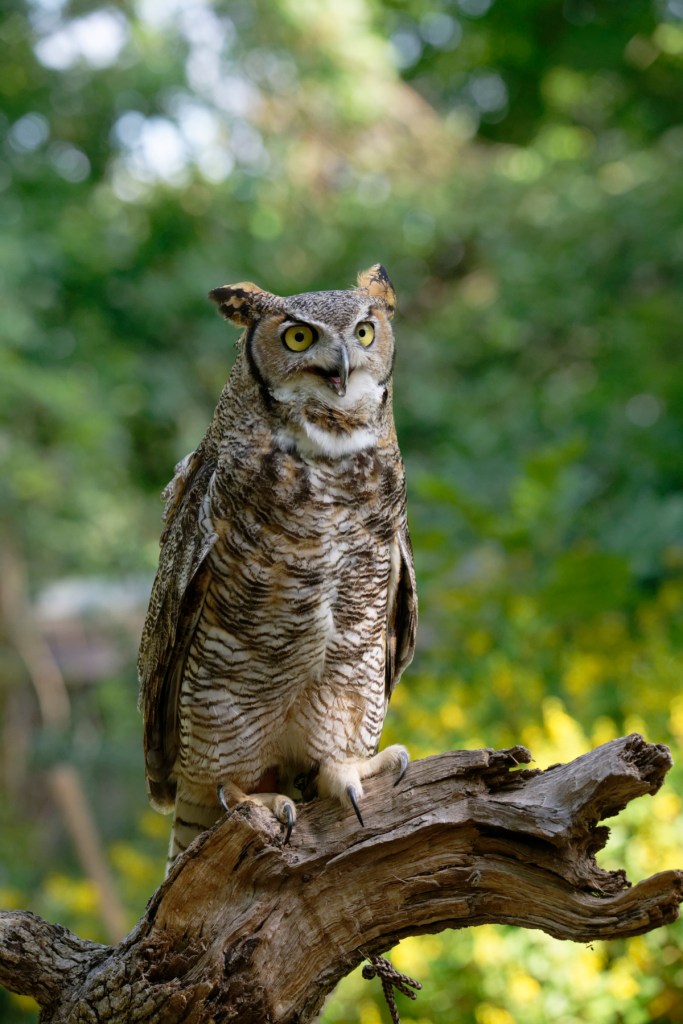
The photographer remains in place but increases the focal length of a zoom lens or changes the lens to one with a longer focal length. The only difference between the two images below it that I changed the focal length from 200mm to 350mm. The lens used was a Nikon Z mount 100-400mm f4.5-f5.6 S lens. (Change in focal length impacted light metering and final exposures.) No processing or cropping was applied to either image below.
The impact on the background is dramatic. The uniform soft green bokeh is what you want to achieve. It is much better than the busy background in the first image. If I had the do this over again, I would have taken the second image as a vertical.
4. Change the f stop on the lens—use a wide f stop like f2.8 or f4 and not f8 or f11 and the background may appear to be smoother. This technique used by itself rarely will resolve a distracting background. But when used with items 2 or 3 above, it can further improve a background.
5. Once in place, shift your position. Always move left or right a few inches or a few feet. The background will change especially with longer focal length lenses. Hot spots or distracting twigs or limbs may disappear (or appear.) Getting lower can have a huge impact on backgrounds too, and will improve the composition. Getting eye to eye with your subject should be your goal.
Summary
There is no magic camera button or custom setting that will fix bad backgrounds. Your knowledge of habitat, nature subjects and his equipment will allow you to anticipate the likely problems and use the correct lens and techniques to produce impactful images with clean backgrounds.
If this article as piqued your interest, read photo articles on related topics–Depth of Field and Hyperfocal distance. Or Google Depth of Field vs. Focus Distance. You can also check out this Depth of Field guide: https://www.photopills.com/articles/depth-of-field-guide
All images were taken by the author at the Houston Audubon Raptor & Education Center in 2021 or 2022. The Great Horned Owl, Simon, is a captive raptor and is one of the education birds.
You can sign up for a Raptor Photo Shoot with Houston Audubon here.
